Celestron CG-4 German Equatorial Mount and Tripod Review: The Best Way to Upgrade Your Astronomy Gear
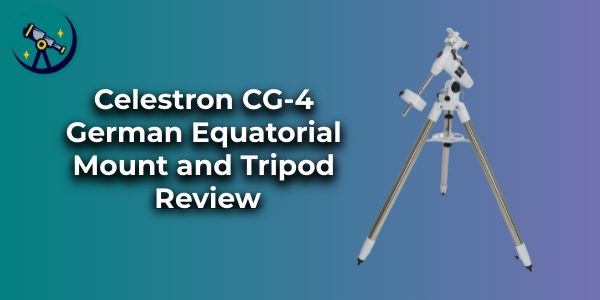
Sometimes we get so hung up on eyepieces and finder scopes for our telescope set that we forget one of the most important parts, the mount.
A good mount can make a night and day difference in your late night adventures, and the CG-4 is pretty much the best bang for your buck out there.
TLDR:
The CG-4 is a great upgrade for any beginner telescope, and should last you a lifetime, but it’s not the best for professional astrophotography ventures.
Why is a Good Telescope Mount Important?
Does the view through your scope bobble and jiggle while your are turning toward a target or adjusting the focus knob?
Then your mount is too light.
Most modern scope manufacturers have to cut a few corners to sell telescopes at a reasonable price. They will include some eyepieces and perhaps a Barlow lens or diagonal to up the value, true enough, but cuts need to be made.
These cuts can be in the glass of the scope, the final polish, the focuser, or even the lens coatings. Trading high density glass for soda glass will save cash without too much being sacrificed on a budget scope, especially for a new astronomer. Eyepieces are sometimes a bit overrated.
But what about the mount?
Unfortunately, this is the most likely component to get the short end of the stick in a package deal. Don’t feel cheated, it’s simply something that happens because we don’t want to spend $1000 to look at the sky, especially before we know if we’ll even enjoy astronomy long enough to make it worth that kind of investment.
Some mounts are bad enough that the picture will shake and wobble in a light breeze, as is especially common with longer and larger scopes.
That said, before you start shopping for TeleVue eyepieces, you might want to upgrade your mount.
A solid mounting platform means little to no shaking, even if it’s a little windy. A solid mount means the stars don’t jiggle while you are trying to adjust the focus, making the viewing process easier and more enjoyable. Smooth bearings and a solid lockup can make star hopping or pointing a breeze while scanning for your target.
In short, a good and sturdy mount makes the enjoyment of astronomy go up by eliminating the hassles associated while moving between targets or following planets at high magnification.
Are Equatorial Mounts Hard to Use?
Browse any astronomy forum and you will find several opinions from different astronomers on whether or not an equatorial mount is good for a beginner.
You’ll also see a lot of jabber about how to set them up properly and what a chore it can be.
Fear not, it really isn’t that big of a deal, especially if you just want to look through your telescope or even snap a couple social media shots with a handy smartphone adapter.
It can be quite a chore if you want to take multiple-minute exposures of deep-sky objects with an astrophotography camera or a DSLR.
Let’s put it this way. I can set up my EQ mount in less than a minute for casual observing. If I want to try some astrophotography, it can take me up to two hours to zero it perfectly for long exposures.
In other words, you can make it as easy as needed.
If you won’t be using the setting circles to dial in targets off your star map, you can use it just as you would an altitude-azimuth mount, it’ll just feel a little weird at first because you have to think tilted, and this takes a little time for everyone.
Essentially, just point the north pole finder end to the north, and start observing. If you watch an object long enough while using the RA adjustment, you’ll notice that it gradually tracks off, but generally follows any object in the sky that you point it at.
This is even better with an optional motor, which you can hook up to drive the scope as the sky turns.
Dialing in Your Alt-Azimuth Mount
To take care of the misalignment, again, this can be easy or complicated depending on how much precision you need.
The little Polaris scope works pretty well for getting you close to the true celestial north pole. Basically, the angled axis needs to be pointed precisely there for it to track perfect.
Look up your latitude on Google, or by some other means, and adjust the tilt of the mount head to that angle. If you live in Reno, NV, for instance, then you should dial the angle to 39.5. Easy, right?
When you set up the mount, you can use a bubble level on the top platform while adjusting the legs to get it as level as possible. If you are having trouble, take the head off and use the flat surface on the tripod mount. Make sure your head will be facing pretty close to true north when you reinstall it.
Once the tripod is level, replace the mount if you had removed it, and look through the guide scope. You should be able to find the North Star, and also use the Big Dipper and Cassiopeia to ensure that your right adjustment is tuned and you are pointed at the celestial pole (it’s a little off from the location of the North Star).
There are adjustment knobs on the front if you need to tweak the head left or right for better alignment, and of course you can tilt the head up or down a little to really zero it in.
Now your all set. With a drive motor (optional upgrade) installed, it should track everything in the sky great for observing. You might need to bump the view a little this way or that after a long viewing time, but you can typically get half and hour to an hour of viewing before your target starts to drift too far from the center of view.
Even in doing all of this, setup should only take a few minutes once you get used to it.
Astrophotography is a different animal, as star tracking to the pixel level is essential, and this can require more setup time. Basically, you need to dial in a star, zoom in as much as possible, and adjust the settings at five or ten minute intervals to ensure that it isn’t moving at all in the frame.
The more precise you wish to be, the longer it will take. But getting pictures of the heavens without blur has always been a tricky subject, and requires its own study course.
With some experience, you’ll know how accurate you want your mount, and how long it takes to get it there. Just remember, it doesn’t need to be anywhere near perfect to still be an enjoyable viewing experience, even with a drive motor.
Using The Celestron Omni CG-4
Celestron has really beefed up their CG-3 over the years, to the point that it has be obsoleted and replaced by the CG-4.
This isn’t a fork mount, or even the top of the line, but for scopes weighing up to fifteen pounds, it does the job pretty well. Some astronomers have been known to load it with a lot more weight than that, especially with catadioptric scopes like a Cassegrain or a Maksutov. Their short body length makes them much easier to manage on lighter mounts.
The mount comes with two weights and a weight bar. Essentially, these counterbalance the weight of the scope.
Step one is to get your scope mounted where it doesn’t move when you release the declination clutch. Once you’ve got that pretty good, add one of the weights and slide it where it balances well when you release the right-ascension clutch. Then you’re pretty much good to go.
Again, you can go a little nuts with this and add some springs and such to balance things at the extremes, but for most of us, balancing the scope properly works pretty well most of the time.
Also, the weights do not need to be the same weight as your scope. Try the little one first, and then switch to the big one if the head won’t balance with the little one.
If you have to use both, then your scope is probably too heavy, but as stated, people get away with this all the time if they aren’t using motors, or at the very least if you aren’t fast-pointing the telescope, such as by adding a go-to setup later on.
Our Review on the Celestron Omni CG-4 XLT Equatorial Mount
This is a terrific mount to add to your collection, even if you already own a couple of other mounts.
It’s light, weighing in at about twenty pounds altogether, not including the counterweight, making it easy to yank out of the trunk and set up on the fly. When coupled with smaller scopes, it works wonderfully.
The first night, we tested it with an Orion ST-80. That little scope was mainly to test how it functions at essentially zero load. The four pound weight easily got us balanced and we were zipping around the sky quickly. There was no noticeable shaking of any kind, so it really runs on lighter scopes.
We tried a few other refractors and an eight-inch Cassegrain with similar results. Pointing these heavier scopes only added a little push weight, but the clutches locked up perfectly and didn’t disturb our view.
Then we swapped up to a heavy six-inch Dobson reflector. At 1200mm of focal length, the aluminum tube acts like a sail in the wind, and the gritty focuser on the one we tested showed a little bit of shake that settled in less than a second. We had to mount some rings to it to make it fit the dovetail.
All in all, the big Dob performed well too, but there were a couple of times that we had to loosen the rings and rotate the tube because some targets gave us an awkward neck positioning. Using a long tube Newtonian reflector also means you need a step-ladder when viewing near the zenith.
We were pleasantly surprised at how well the CG-4 handled the big Dog, and we’ll give the Celestron Omni CG-4 our stamp of approval. It really is a terrific mount, especially with smaller scopes, and takes your viewing to a whole new level.
You might even get a bit of snob injected when you look back at the mount your scope came off of, especially if it was one of those camera tripod deals. You might never go back to a cheap mount, so beware.